Create a WordPress Dashboard plugin with React JS
April 26, 2023
WordPress and ReactJS are the most used frameworks, one being the most used javascript framework, while the latter is the most used CMS and accounts for about 51% of active websites. In this tutorial am going to show you how you can combine WordPress and ReactJS to build a WordPress plugin. The plugin will be a widget that displays the current time on the WordPress dashboard.
Here’s what we’ll cover:
- Creating the WordPress react-plugin boilerplate with composer and npm.
- Connecting WordPress and ReactJs
Creating the WordPress react-plugin boilerplate with composer and npm.
In this section, we shall create the basic template boilerplate for connecting WordPress and npm; you will need Composer and Nodejs installed on your local pc to be able to follow up.
Step 1
Head to your WordPress installation wp-content -> plugins; you create a folder called React-WordPress. Then from there, run the following command
composer initthis will generate a filecomposer.json{
"name": "hardpro/react-wordpress",
"description": "dashboard widget to display time",
"license": "MIT",
"autoload": {
"psr-4": {
"Hardpro\\ReactWordpress\\": "src/"
}
},
"authors": [
{
"name": "lewatt23",
"email": "lewatt23@gmail.com"
}
],
"minimum-stability": "dev",
"require": {}
}
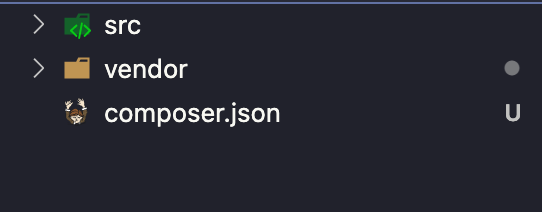
Afterwards, we need to initialize git, so run the command below
git initthen create a file called .gitignore and add the following in it; this will remove them from being tracked by git
/node_modules
/vendor
After doing that, your folder structure should be something similar to this
Step 2
Now that composer has already been set up, what we have to do next is to init npm and for that, run the following command
npm initAfter you will be prompted to enter some information about the project, feel free to enter what you please; here is how mine looks after I entered the information.
{
  "name": "react-wordpress",
  "version": "1.0.0",
  "description": "",
  "main": "index.js",
  "scripts": {
    "test": "echo \"Error: no test specified\" && exit 1"
  },
  "author": "",
  "license": "ISC"
}
then we need to add @wordpress/scripts in our dependencies, for that run the command below
npm install @wordpress/scripts --save-devThe @wordpress/scripts come with some default setting permitting the users to build, test and start our project; you can find the complete list of commands here. But for the moment, we will focus on the commands build and start.
	"scripts": {
		"build": "wp-scripts build",
		"start": "wp-scripts start",

	}
Copy the scripts above and add them to your package.json, when that has been done, we need to create a file webpack.config.js and add to it include the following code
const defaults = require('@wordpress/scripts/config/webpack.config');

module.exports = {
  ...defaults,
  externals: {
    react: 'React',
    'react-dom': 'ReactDOM',
  },
};
This will help configure webpack to support Reactjs in its bundling process.
Connecting WordPress and ReactJs
In the previous section, we did configure a basic React js setup; in this section, we will connect everything and make it work as one.
Picking up from where we left off, create a file called main.php in the templates folder, this file will serve as the entry file between React js and WordPress. Inside the file, insert the following
<div id="reactwordpress">
    <h2>Loading...</h2>
</div>
Now that has been done, we will move ahead and create the entry file for a plugin, this is a file that contains the basic information about the plugin and also the file WordPress uses to identify the plugin, more about it here. so head to your root directory and create a file called index.php. In it, add the following code
<?php
/**
 * Plugin Name:       React WordPress
 * Description:       Simple plugin to display time using Reactjs and WP Rest.
 * Requires at least: 5.8
 * Requires PHP:      7.0
 * Version:           0.1.0
 * Author:            Stanly Medjo
 * License:           MIT
 * License URI:       MIT
 * Text Domain:       reactwordpress
 */
Just by adding the code above, your plugin should already be available on your dashboard, head up to your WordPress dashboard and activate your plugin.

Since the plugin has been activated, we will continue by defining some basic paths which will be used in our plugin
// Basic plugin setup

define('REACTWORDPRESS__PLUGIN_FILE',__FILE__ );
define('REACTWORDPRESS__PLUGIN_DIR',plugin_dir_path( __FILE__ )  );
define('REACTWORDPRESS__PLUGIN_URL', plugins_url( '', REACTWORDPRESS__PLUGIN_FILE));
Next, we head to our route folder and create a new folder called process, which will contain all the logic of our application. In the process folder, create two different files, init.php and enqueue.php
In the init.php, add the following code.
<?php


/**
 * Add a new dashboard widget.
 */
function reactwordpress_dashboard_init() {
wp_add_dashboard_widget( 'dashboard_widget', 'React wordpress', 'reactwordpress_widget_init' );
}


/**
 * Init Widget function
 *
 */
function reactwordpress_widget_init() {
    require_once  REACTWORDPRESS__PLUGIN_DIR. 'templates/main.php';


}
The code above adds the widget to the WordPress dashboard, which is accomplished by the wp_add_dashboard hook.
Now in the enqueue.php file, add the following code
<?php

/**
 * Enqueue scripts and styles.
 *
 * @return void
 */
function reactwordpress_enqueue_scripts() {
    wp_enqueue_style( 'reactwordpress-style', REACTWORDPRESS__PLUGIN_URL . '/build/index.css' );
    wp_enqueue_script( 'reactwordpress-script', REACTWORDPRESS__PLUGIN_URL. '/build/index.js', array( 'wp-element' ), '1.0.0', true );
}
finally, update your index.php with the following code, this defines the different hooks that will be used to enqueue the scripts and add the widgets to the dashboard
// Includes

require_once RANKMATHTEST__PLUGIN_DIR. '/process/init.php';
require_once RANKMATHTEST__PLUGIN_DIR. '/process/enqueue.php';

// Hooks


add_action( 'admin_enqueue_scripts', 'reactwordpress_enqueue_scripts' );
add_action( 'wp_dashboard_setup', 'reactwordpress_dashboard_init');
, and your final index.php should look as this
<?php
/**
 * Plugin Name:       React WordPress
 * Description:       Simple plugin to display time using Reactjs and WP Rest.
 * Requires at least: 5.8
 * Requires PHP:      7.0
 * Version:           0.1.0
 * Author:            Stanly Medjo
 * License:           MIT
 * License URI:       MIT
 * Text Domain:       reactwordpress
 */


// Basic plugin setup

define('REACTWORDPRESS__PLUGIN_FILE',__FILE__ );
define('REACTWORDPRESS__PLUGIN_DIR',plugin_dir_path( __FILE__ )  );
define('REACTWORDPRESS__PLUGIN_URL', plugins_url( '', REACTWORDPRESS__PLUGIN_FILE));


// Includes

require_once REACTWORDPRESS__PLUGIN_DIR. '/process/init.php';
require_once REACTWORDPRESS__PLUGIN_DIR. '/process/enqueue.php';

// Hooks


add_action( 'admin_enqueue_scripts', 'reactwordpress_enqueue_scripts' );
add_action( 'wp_dashboard_setup', 'reactwordpress_dashboard_init');
Now we have finished configuring the PHP part of the WordPress plugin, what do we need to link it to the Reactjs,so let’s get started
Create an src folder; in it, create index.js and add the following code.
import App from "./App";
import { render } from "@wordpress/element";

import "./styles/main.css";


// Render the App component into the DOM
render(<App />, document.getElementById("reactwordpress"));
Also, create another folder in the src folder called style it, and create a file called main.css, in the main.css, add the code below
#reactwordpress{
color:red;
}
Now to wrap up, we need to create a file in the src folder called App.js and modify it as follows
import React from "react";

const App = () => {
  let today = new Date();
  let date =
    today.getFullYear() + "-" + (today.getMonth() + 1) + "-" + today.getDate();
  let time =
    today.getHours() + ":" + today.getMinutes() + ":" + today.getSeconds();
  let dateTime = date + " " + time;
  return (
    <div>
      <h4>{dateTime}</h4>
    </div>
  );
};

export default App;
To be able to display our widget, we will need to build our assets( CSS and Javascript) and to do that; we need to run the following command from the WordPress @wordpress/scripts package.
npm run buildNow that has been done, head up to your WordPress dashboard, add you will surely see a new widget displaying the time.

here is how my final project folder looks like
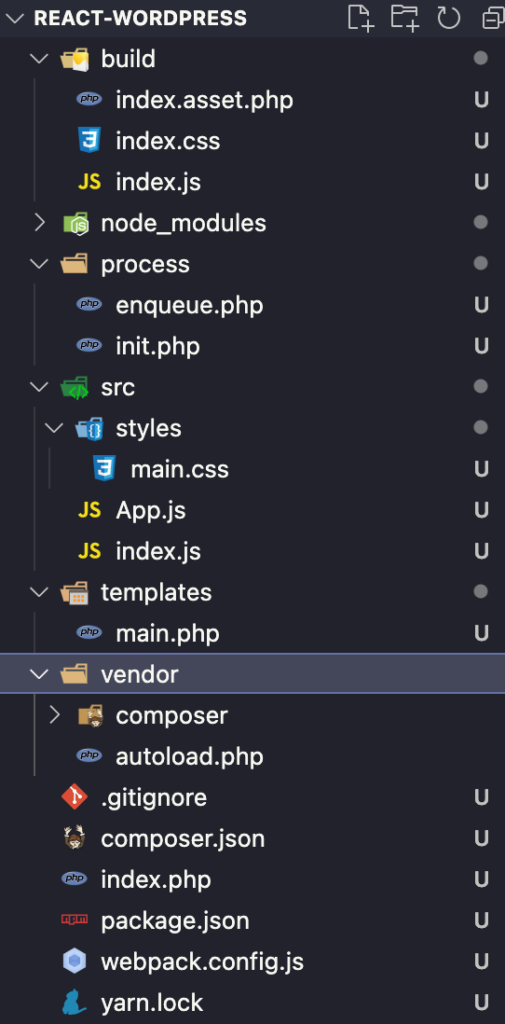
if you like to bundle your plugin, what you will have to do is delete the node_modules folder, then zip the project folder and volà your plugin is ready to be used
Conclusion
In this article, we saw how we could use Reactjs to build a WordPress plugin and link up this to create a dashboard widget; this article was highly inspired by tecadmin.net. If you will like to get the full code for this project, it can be found on GitHub.
lewatt23
Stanly is a web and mobile developer passionate about creating engaging and user-friendly digital experiences. he has 4+ years building web and mobile applications.
Related Posts
You may also like