Adding push Notifications with Firebase messaging and Notifee in React Native.
May 22, 2023
Push notifications in mobile development is a must-go step which any developer who wants to engage his audience needs to implement. In React Native, Notifee is the default solution when implementing rich push notifications in React Native. It has more than 1.3k and is actively maintained. This article will cover how to implement push notifications with Firebase messaging and Notifee In React Native. Throughout hout this article, we will see the following:
Before starting, the prerequisite for this article is having already React Native installed, I have created a default project in which we practise.
Configuring Notifee and Firebase messaging
1. Configuring Notifee
Now that we have gone through the basics, let’s start with actual code. To start, head to your terminal and install Notifee by running the following command.
yarn add @notifee/react-nativeNow that Notifee has been installed, we will review some of its basic APIs that display notifications.
1. notifee.createChannel: This API permits us to create a unique channel and returns a channel Id, which is used by Google services to send notifications an application can have one or more channels. Examples of how to create notifications are as follows.
  const channelId = await notifee.createChannel({
      id: '', // put a custom channel
      name: '', // put a custom channel name
    });
2. notifee.displayNotification: This API displays the notifications on the user’s screen. It takes as parameters the channelid, generated above.
    // Display a notification
   notifee.displayNotification({
      title: 'Notification Title',
      body: 'Main body content of the notification',
      android: {
        channelId:'',
        smallIcon: 'name-of-a-small-icon', // optional, defaults to 'ic_launcher'.
        // pressAction is needed if you want the notification to open the app when pressed
        pressAction: {
          id: 'default',
        },
      },
    });
3. notifee.onForegroundEvent : This API handles the notifications for applications in the foreground. It returns the event type and the notification details.
 notifee.onForegroundEvent(({ type, detail }) => {
      if (type === EventType.PRESS) {

      }
    });
Now that we have gone through Notifee, we will look into configuring Firebase messaging.
2. Configuring Firebase Messaging
In the previous section, we saw how to configure Notifee. Now, we are going to install Firebase messaging and configure it with Notifee to send notifications, but before that, let’s start by installing it, for more about the basic APIs here. Run the command below to install the Firebase app.
yarn add @react-native-firebase/app @react-native-firebase/messagingnext, we will need to add our application to create a new project in the Firebase console to manage the applications. follow the steps below:-
1. Head to the Firebase console create a project, and select a new project. After that, you will have to enter information about the project.

As soon as the project is created, you need to head to the general setting and add an Android project; still, in your Android project, you will need to add the same project name as the one in your React Native project, my case, the package name is com.rnpushnotification.
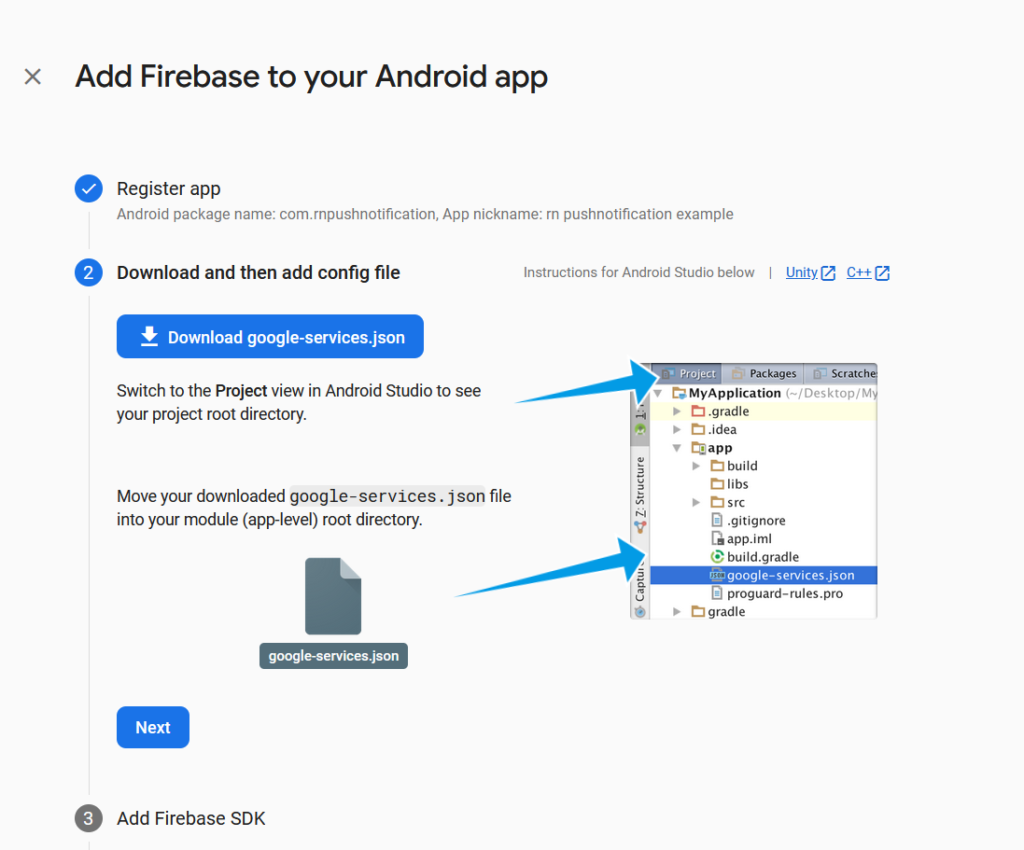
Download the google-services.json file and add it to /android/app/google-services.json. After that, update your gradle dependencies. Lets will start by updating the gradle with Google services in the /android/build.gradle as follows.
buildscript {
  dependencies {
    // ... other dependencies
    classpath 'com.google.gms:google-services:4.3.15' //<--- added this
    // Add me --- /\
  }
}
Lastly, head to your /android/app/build.gradle file and add the lie below.
apply plugin: "com.android.application"
apply plugin: "com.facebook.react"
apply plugin: 'com.google.gms.google-services' // <- Add this line
That being done, what’s left, it’s sending actual notifications.
Send Firebase notification to React Native app.
Since we have already configured our application, we will create a HOC that manages all the notifications in our application. Start by adding a new folder called services in it, create a file called notification.ts in it, add the following code.
import {useEffect, useState} from 'react';

import messaging, {
  FirebaseMessagingTypes,
} from '@react-native-firebase/messaging';
import notifee, {EventType} from '@notifee/react-native';
import {Linking} from 'react-native';

const PushNotificationController = (props: any) => {
  const [firebaseToken, setToken] = useState<string | null>(null);

  const requestFCMPermission = async () => {
    const authResponse = await messaging().requestPermission();
    const enabled = authResponse === messaging.AuthorizationStatus.AUTHORIZED;

    if (enabled) {
      // Register the device with FCM
      await messaging().registerDeviceForRemoteMessages();
      // Get the token
      const fcmToken = await messaging().getToken();
      console.log('token', fcmToken);
      setToken(fcmToken);
    }
  };
  const onMessageHandler = async (
    remoteMessage: FirebaseMessagingTypes.RemoteMessage,
  ) => {
    const {notification, data} = remoteMessage;


    const channelId = await notifee.createChannel({
      id: 'rnpushnotifi-id',
      name: 'renpushnotifi',
    });

    notifee.displayNotification({
      title: notification?.title,
      body: notification?.body,
      data: data || {},
      android: {
        channelId,
        smallIcon: 'ic_launcher_round',
      },
    });
  };

  useEffect(() => {
    requestFCMPermission();
    const unsubMessaging = messaging().onMessage(onMessageHandler);

    return () => {
      unsubMessaging();
    };
  }, []);

  useEffect(() => {
    const unsubscribe = notifee.onForegroundEvent(({type, detail}) => {
      if (type === EventType.PRESS) {
        const {link = null} = detail.notification?.data || {};

        if (link) {
          Linking.openURL(link);
        }
      }
    });
    return () => {
      unsubscribe();
    };
  }, []);

  useEffect(() => {
    messaging().onNotificationOpenedApp((remoteMessage: any) => {
      const {link = null} = remoteMessage.data || {};

      if (link) {
        Linking.openURL(link);
      }
    });

    // Check whether an initial notification is available
    messaging()
      .getInitialNotification()
      .then((remoteMessage: any) => {
        if (remoteMessage) {
          const {link = null} = remoteMessage.data || {};

          if (link) {
            Linking.openURL(link);
          }
        }
      });
  }, []);

  return null;
};

export default PushNotificationController;
This code will generate the Firebase token and display the notification on your React Native application using Notifee. Afterwards, add the HOC to your App.tsx, that, and modify it as follow.
/**
 * Sample React Native App
 * https://github.com/facebook/react-native
 *
 * @format
 */

import React from 'react';
import type {PropsWithChildren} from 'react';
import {
  SafeAreaView,
  ScrollView,
  StatusBar,
  StyleSheet,
  Text,
  useColorScheme,
  View,
} from 'react-native';

import {
  Colors,
  DebugInstructions,
  Header,
  LearnMoreLinks,
  ReloadInstructions,
} from 'react-native/Libraries/NewAppScreen';
import PushNotificationController from './services/notification';

type SectionProps = PropsWithChildren<{
  title: string;
}>;

function Section({children, title}: SectionProps): JSX.Element {
  const isDarkMode = useColorScheme() === 'dark';
  return (
    <View style={styles.sectionContainer}>
      <Text
        style={[
          styles.sectionTitle,
          {
            color: isDarkMode ? Colors.white : Colors.black,
          },
        ]}>
        {title}
      </Text>
      <Text
        style={[
          styles.sectionDescription,
          {
            color: isDarkMode ? Colors.light : Colors.dark,
          },
        ]}>
        {children}
      </Text>

    </View>
  );
}

function App(): JSX.Element {
  const isDarkMode = useColorScheme() === 'dark';

  const backgroundStyle = {
    backgroundColor: isDarkMode ? Colors.darker : Colors.lighter,
  };

  return (
    <SafeAreaView style={backgroundStyle}>
      <StatusBar
        barStyle={isDarkMode ? 'light-content' : 'dark-content'}
        backgroundColor={backgroundStyle.backgroundColor}
      />
      <ScrollView
        contentInsetAdjustmentBehavior="automatic"
        style={backgroundStyle}>
        <Header />
        <View
          style={{
            backgroundColor: isDarkMode ? Colors.black : Colors.white,
          }}>
          <Section title="Step One">
            Edit <Text style={styles.highlight}>App.tsx</Text> to change this
            screen and then come back to see your edits.
          </Section>
          <Section title="See Your Changes">
            <ReloadInstructions />
          </Section>
          <Section title="Debug">
            <DebugInstructions />
          </Section>
          <Section title="Learn More">
            Read the docs to discover what to do next:
          </Section>
          <LearnMoreLinks />
        </View>
      </ScrollView>
         <PushNotificationController />
    </SafeAreaView>
  );
}

const styles = StyleSheet.create({
  sectionContainer: {
    marginTop: 32,
    paddingHorizontal: 24,
  },
  sectionTitle: {
    fontSize: 24,
    fontWeight: '600',
  },
  sectionDescription: {
    marginTop: 8,
    fontSize: 18,
    fontWeight: '400',
  },
  highlight: {
    fontWeight: '700',
  },
});

export default App;
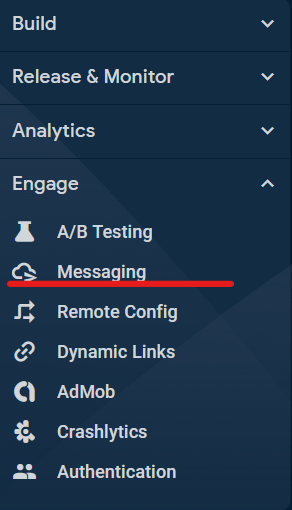
Now that is done, we need to send a notification and see if we can receive it. For that head to your Firebase project you created above. After opening it, on the right side, select Firebase messaging.
from there, create a new campaign and select Firebase Notification messages in the popup.
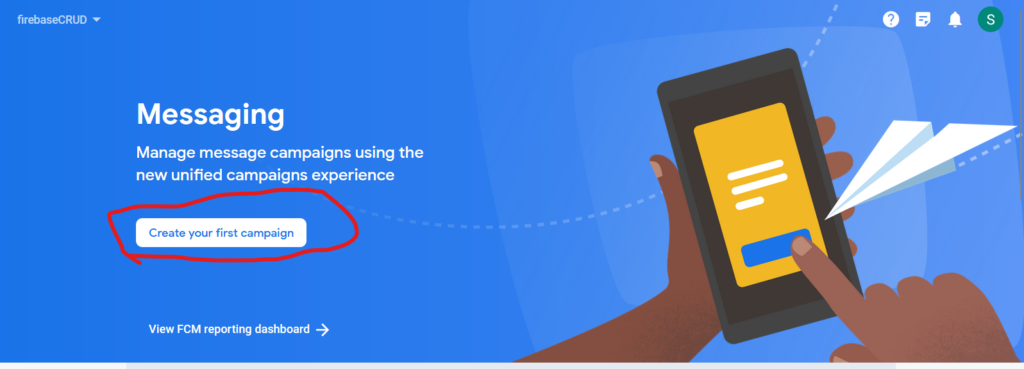
Now create your campaign as follow
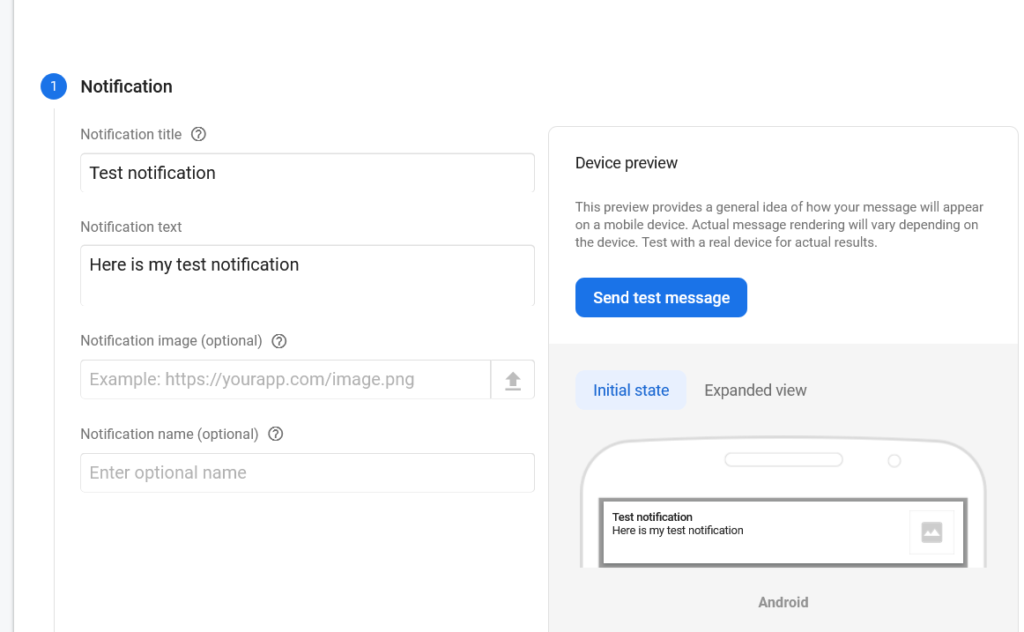
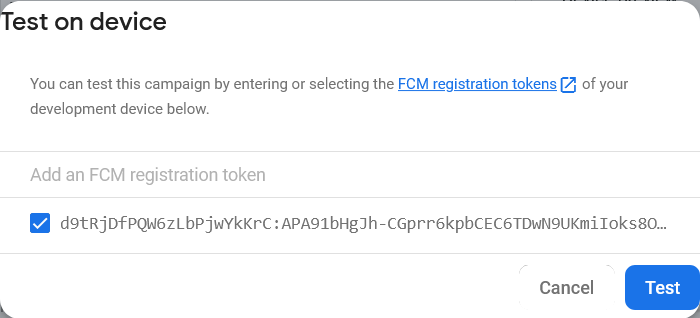
fill the notification title and text with the text you will send to the user. Afterwards, click on the send test message button and add the user token to send a target notification to the user’s phone. To get the user token, head to your console can copy it.
PS: I consoled the messaging().getToken() to get the user’s token, also you need to note the token changes after a certain time so if you are planning to store it or it’s important to change to verify it has not changed.
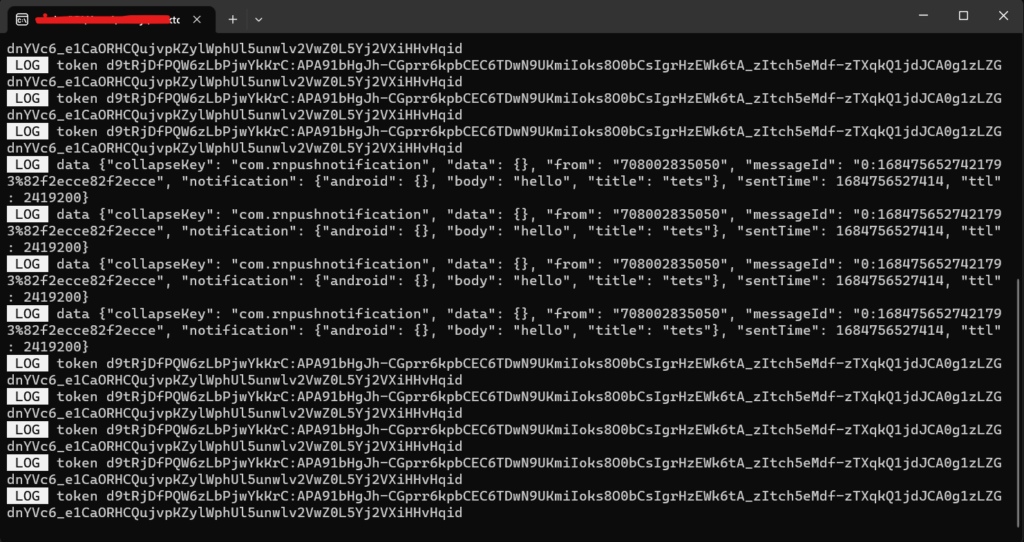
To send the notification press the send button. You should be able to see that on your phone. You did everything correctly.

Conclusion
In this article, we saw how to use Firebase and Notifee to send and receive notifications. We also covered some basic APIs for both packages and saw how to merge them together to create HOC to generate Firebase cloud messaging tokens and receive notifications with Notifee. The whole project is on GitHub. If you have any issues, let me know in the comments. Thanks, and happy coding 🙂
lewatt23
Stanly is a web and mobile developer passionate about creating engaging and user-friendly digital experiences. he has 4+ years building web and mobile applications.
Related Posts
You may also like